Monday 27 March 2017

Crochet Easter Chicken


Chicken
Courtesy of Top Crochet Patterns
With Easter soon on the horizon I have started to think about gifts for the family. I came across this lovely pattern on Pinterest from Top Crochet Patterns. As I usually knit I also fancied a bit of a change and dug out my crochet hooks and my small balls of yarn and got to work.

From start to finish I spread this out over 2 days but I would estimate that an afternoon of solid work would allow you to complete it. If you are a faster crocheter I would estimate approximately 3-4 hours rather than my 6-7 hours.

Yarn and Notions

As I classed this project as a yarn buster the most you'll need of any color (mostly the body and nest) is 25 grams, the rest I would estimate at under 15 grams for completion.

I'm not able to tell you the exact yarns I used as they were all from the spare yarn stash but they were all Double Knit weight in the following colors:
  • Raspberry Pink
  • Kiwi Green
  • Banana Yellow
  • Blood Orange
I also used my 5 mm ergonomic crochet hook originally purchased from Knit Picks, a darning needle, stitch marker, and scissors. You will also need something to make the eyes with; the pattern calls for 9 mm safety eyes but I only had 5 mms in stock but you could also used yarn or embroidery thread if you wanted to.

Thoughts On Making The Chicken

I really enjoyed making this chicken as it quickly comes together and there are not too many pieces that need assembling together. I have had some previous experience with making soft toys and have found them tricky to work with but this was a much nicer project to complete. 

In this construction I decided to make all of the components and then pin them all together before making any permanent fixtures. I prefer doing it this way as you can get an idea of the character you want your chicken to be displaying, it's wonderful the range of "expressions" you can come up with just by placing a beak or comb higher or lower on the face. In the end I went with the recommended placements provided in the pattern and sewed the pieces together with matching thread. I was contemplating using my hot glue gun but as the toy is going to a toddler sewing is the better option as it may end up going in the washing machine in the future.
Friday 10 March 2017

Cabled Cushion Cover


Cable Pattern
Cable Knit

For Mothers' Day I have made my Mom a custom Cabled Cushion Cover by Angela Chick and the pattern can easily be found for free on Ravelry.

I was amazed at how quickly this project flew off my needles. It has a simple 20 row repeat that you can soon memorize and you only need to make two pieces before sewing them together.

The needles that I'm using were handed down to me by my Grandma so I'm afraid I don't have a name for the manufacturer but they are in a US size 11 or 8.0 mm gauge. 
First half of the cushion front

The yarn I chose was James Brett's Marbled Chunky Yarn which I still have plenty of left over. I used approximately 1/2 of the skein so I will look at using the rest in either a blanket or making some wash clothes out of.

Blocking
You can see in the photo above that the two halves of the cushion cover are different sizes, this is so that when you put it together it will create a "lip" to close up the cushion with the buttons (see below). 
I definitely needed to block the two pieces as the edges were curling in on themselves due to the stockinette edging. This is a common problem with these types of pieces however, blocking them certainly got the job done. 

When it came to actually getting the pieces blocked I decided to take a risk and pop them into the washing machine on a delicate wool hand wash setting as I didn't really have the time to do it by hand. I'm so glad that I made the decision with this wool because by the time it came out of the washing machine it had already stretched and relaxed a little which made pinning the pieces to my sofa so much easier. I left the two pieces there to dry overnight and then the next day I sew them together and added some buttons.
Finished but not stuffed
I decided not to provide a cushion casing for this project as my Mom already has plenty of cushions she can swap around. However, in the future if I want to give a cushion I would whip up (in some cotton fabric) an internal case for the cushion to live in and then stuff that with polyester toy stuffing that I got from my local yarn shop.

Where Can I Learn To Knit?

I have recently published an article about learning the basics and included an easy pattern for you to get started with. Simply visit Learn To Knit and get your yarn on!

Saturday 4 March 2017

Hermione's Everyday Socks


I had calling to cast on another pair of socks today so I had a good look through my Ravelry library and yarn stash and found this great pattern called Hermione's Everyday Socks by Erica Lueder. 

I've made plain old vanilla socks a few times now and I've got these down to a fine art but this time I wanted a challenge. This pattern has got a wonderful knit and purl combination that's nice and easy to remember and run through without a lot of thought which is perfect for me as I often knit while doing something else like watching TV or talking with friends. I'll also be doing a different type of heel flap that I've never done before which is an adapted Eye of Partridge Heel so I'm excited about trying something new!

The cuff and start of leg pattern you can see in the photo only took me a couple of hours to do. I do a lot of my knitting while I'm either waiting somewhere (like picking up the other half or at the doctors office) and I had quite a bit of down time hence the great progress I made.

Ribbed Sock Cuff
Cuff and start of leg pattern
The needles that I'm using are my KnitPro 3mm Symfonie interchangeable circular needles. I love these knitting needles as they are very smooth and the join itself is not noticeable as long as you have a good cable too.

The yarn that I am using Sirdar (Hayfield) Bonus DK 100g in Orchid Pink and is one of my yarns I found hidden in my stash. I acquired this yarn in Christmas 2016 when a certain Secret Santa gifted me this along with a bunch of mini skeins. The yarn is a little rough to knit with so I'm hoping that it will soften up after blocking but I'm also OK if it doesn't because it will last even longer. I'm thinking of doing the toe in a contrasting color but I haven't yet made any decisions around that yet (stay tuned for more).

Heel flap and turn
Adapted Partridge Heel Flap
As you can see in the photo above I have been able to easily complete the heel flap and I'm about to set up the heel turn. The heel turn is an adapted version of the partridge heel flap and turn and I found it very easy and fun to get done. As I was only working on one side of the sock in flat knitting the heel was done very quickly and I was able to whip up the gusset and go on to do the toe decreases.

Second sock syndrome
Completed first sock
Sock number one is shown above in all of its unblocked glory. I fancied a contrasting color in the toe so I have used some spare Merino 2ply wool. Even though the Merino is 2ply and the Orchid Pink is 3ply for me there is no real difference (at least that my toes can tell) in gauge and it fits absolutely fine.

Now on to sock two!

Where Can I Learn To Knit?

I have issued a new article called Learn How To Knit which covers off all the basic with knitting to get you going on a number of simple projects. If socks are a bit to ambitious for you then have a look at the article and see my super easy beginner scarf pattern.


Thursday 2 March 2017

Bank-Head Beanie Hat


Handmade knitted hat
Finished Beanie
As the weather has been colder than normal I thought I would treat myself to a new beanie. This pattern is called Bankhead by Susie Gorlay and was inspired by her favorite ghost town Bankhead in the Banff National Park. This great pattern can be found on Ravelry.

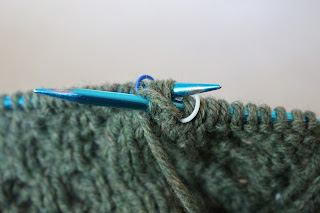
This is my very first hat and I'm so pleased with how it turned out and it fits great. I used my favorite interchangeable nickle plated circular needles by Addi from a set that I got for Christmas. For this pattern I used the 4.5 mm needles on a 60 cm cable using the magic loop method. The yarn I'm using is a chunky marble acrylic based yarn I found in my local yarn store. The acrylic based yarn was chosen for it's hard-wearing properties as I plan on wearing this a lot and it will more than likely get popped in the wash a few times too.

Casting on my hat was straight forward and I used an extra stitch to bind-off with the first stitch on the left needle to join in the round: I found this method eliminates the small "step" when joining in the round and makes a nice smooth join. 
Rib knit
Completed Ribbing
The pattern itself is very easy to read and also to work out what size hat you need to make. I chose the medium adult size and it's just snug enough. I was expecting this hat to take a couple of days to knit up (based on my knitting schedule), however I was pleasantly surprised when I was suddenly mid-way though the pattern and about to get into the decreases to make the crown of the hat. As I was flying along this hat I was able to get everything done in one day, including weaving in and blocking.

Stockinette
Mid-way stockinette

I am certainly going to be making more of these hats as gifts for next Christmas and bust through some of my stash that is beginning to over flow the living room.


Products Used: